


Quick Answer: Chunky glitter gives bold, high-coverage sparkle with flakes you can see one by one — round and shaped cuts commonly run 3 mm to 6 mm. Fine glitter sits flat and reads as a smooth shimmer. Choose chunky for tumblers, mosaics, and shaped accents; choose fine for coasters, nails, and any surface you want to feel smooth.
Chunky glitter vs fine glitter is not a quality contest. The two sizes solve different problems, and picking the wrong one usually shows up as a finish you cannot fix later. Either the flakes sit proud of the surface and catch on everything, or the sparkle is so fine it disappears under the first clear coat.
Type "how to stop glitter from shedding" into any search engine and you get the same advice from forums, wikis, and short-video tutorials: spray it with hairspray. The tip repeats so often that it reads like settled fact. It's also the wrong answer for anything you plan to wear, wash, or sell, because hairspray leaves a tacky film that grabs lint and darkens over time.
If you have ever tipped a jar of glitter over a tumbler and watched a third of it land on the table, you already know the size decision sets up everything that follows. Big flakes need a different adhesive layer, a different amount of product, and a different sealing step than fine glitter does.
This guide covers how glitter sizes are actually measured, which cut fits which project, three ways to apply chunky glitter, how to seal it so it stops shedding, and why the same jar of glitter fades inside resin and nail polish but holds its color in craft glue. Everything here applies to the loose glitter sold in bags and jars, the kind measured in grams and ounces rather than the pre-mixed bottles.
Key Takeaways
- Chunky and fine are not a ranking. Both describe flake size. A 3 mm holographic flake and a 0.2 mm fine glitter can carry the same color, the same PET film, and the same heat tolerance.
- Buy by millimeter, not by the word on the label. Industry pages label fine glitter as .010 in / 0.3 mm, while "chunky" is often used for a mixed-size hex cut rather than one large flake. The label word is marketing; the number is the product.
- Shedding comes from the edge of the flake, not the strength of the glue. Flakes that sit above the adhesive layer get caught on fabric, towels, and skin until they lift. A seal coat that buries the edges fixes more cases than a stronger adhesive does.
- Weight tells you nothing about coverage. 10 g of 6 mm flakes covers far less surface than 10 g of 0.2 mm glitter. Estimate by area and flake size, then add a waste margin.
- Resin and nail polish attack color from the inside. Solvent-resistant color is the filter that matters for those two projects; craft glue and paper do not create the same problem.
What "Chunky Glitter" Actually Means
Ask three sellers what chunky glitter is and you may get three different answers. That confusion costs money, because it decides whether the bag in your hand matches the picture in your head.
A US craft retailer usually defines chunky glitter as a mix of flake sizes, with larger and smaller hexagonal cuts tumbled into one jar. The Glitter Guy's sizing page uses exactly that definition and separates it from ultra fine, fine, and medium by number.
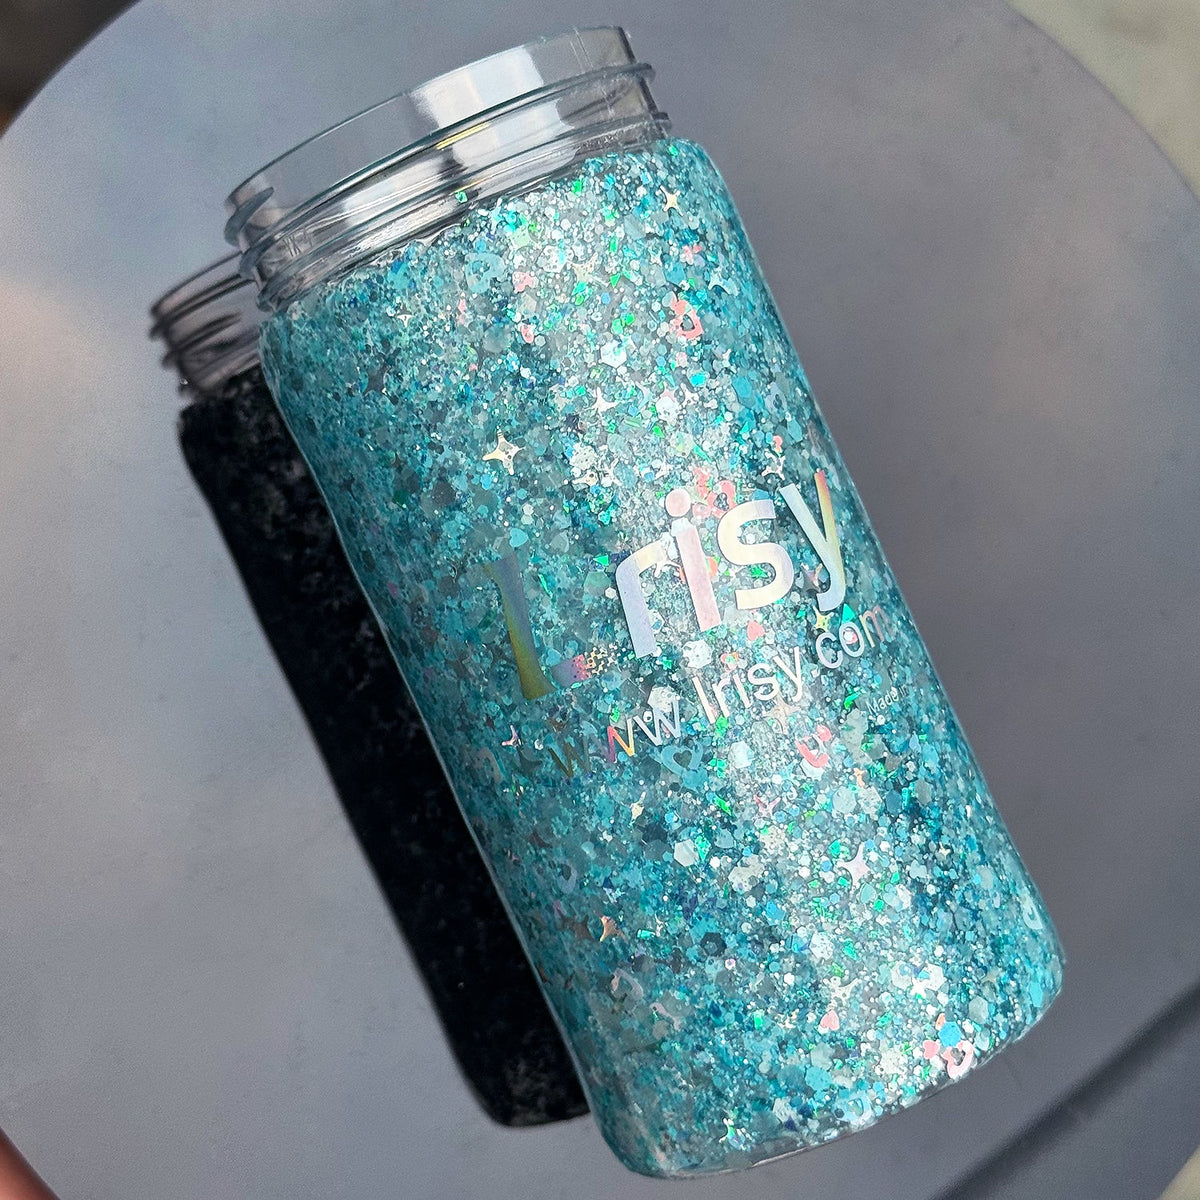
Buyers mean something simpler. If you picture flakes you could pick up with tweezers, you mean the big ones: the 3 mm to 6 mm range.
The manufacturers who cut the film tend to skip the word entirely and name products by measurement. LRISY's shaped line lists round and shaped cuts at 1.5 mm, 3 mm, 4 mm, and 6 mm, with the shape (heart, star, butterfly, snowflake) carried in the product name rather than in a category label.
So one word is doing three jobs: a mix of sizes, one large flake, and a loose marketing tier. The millimeter figure is the only part that means the same thing to everyone in the chain.
Glitter Is Not Sequins, and the Difference Matters Here
The two words get swapped constantly, including on product pages. Sequins are the perforated discs sewn onto garments; sequin fabric is a textile. The loose decorative flake you pour from a bag, measured in grams and used in resin, nails, slime, tumblers, and ornaments, is glitter.
That distinction matters when you search for technique. Advice written for sequin fabric assumes a needle, a seam allowance, and a garment that will be washed. Advice written for loose glitter assumes an adhesive, a surface, and a seal coat. Applying one set of instructions to the other is how projects stall halfway.
Chunky vs Fine Glitter: The Size and Cut Table
Here's the reference most guides skip. The inch and metric columns come from the industry sizing convention; the right-hand columns are what the size actually does on a surface.
| Cut / Label | Inch | Metric | How it reads on a surface | Projects it suits |
|---|---|---|---|---|
| Ultra fine | .002 in (1/500) | 0.05 mm | A tint, not a texture; reads as metallic shimmer | Body and face glitter, resin tinting, smooth blends |
| Fine | .010 in (1/96) | 0.3 mm | Smooth sparkle; barely detectable under a fingertip | Nail art, coasters, tumbler base layers, paper crafts |
| Medium | 0.025–0.040 in (1/40–1/24) | 0.6–1 mm | Individual flakes still lay flat | General crafts, ornament fills, resin inlays |
| Chunky mix | varies by batch | mixed | Uneven light catch; some flakes sit higher than others | Tumbler top layers, geode edges, textured finishes |
| Shaped / large cut | — | 1.5 mm – 6 mm | Distinct shapes placed one at a time | Mosaics, ornaments, balloons, nail accents, decals |
The first three rows follow the standard cut convention published by US glitter retailers. The shaped row is a different animal. Those flakes are die-cut into hearts, stars, and other outlines, so their "size" describes the longest dimension of the shape rather than the width of a hexagonal cut.
Two practical notes before you buy. First, a mixed jar is not a defect; chunky mixes are sold that way on purpose because the size spread fills gaps that a single size cannot. Second, when a listing says only "chunky," treat the millimeter figure as missing information and ask for it, or look for the same colorway in a product line that publishes its dimensions.
Why Particle Size Changes the Whole Process
Size isn't a cosmetic choice you make at the end. It changes four things at once, and each one has a failure mode attached.
Flake count per area. A layer of fine glitter puts thousands of particles where a chunky layer puts dozens. Fine glitter therefore reads as continuous coverage; chunky reads as distinct sparkle points with surface visible between them. If you want the surface itself to disappear under sparkle, chunky will fight you. You keep adding more, and the layer gets thick enough to catch on things.
Contact with a curved surface. Flakes are flat. Tumbler walls, ornaments, and bottle curves are not. The larger the flake, the less of it touches the substrate, and the more of its edge stands free. A 0.3 mm flake bends into a curve without complaint; a 6 mm shape rests on its center and leaves the rim in the air.
That gap is where shedding starts.
Edge exposure. Adhesion happens across the bottom face, but the forces that remove a flake act on its edge (a towel, a sleeve, a fingernail). A large flake presents a longer, taller edge and more leverage. This is the mechanical reason a big flake can sit on a well-bonded layer of adhesive and still come off, while the fine glitter underneath stays put.
Light behavior. Fine glitter scatters light from a dense field of small facets, which produces an even shimmer. Chunky flakes act more like individual mirrors: fewer of them, each one brighter and angled differently. Rotate the finished object and a chunky finish changes character; a fine finish mostly changes intensity.
None of this makes one size better. It means the size you choose sets which failure modes you will be managing, and the rest of this guide is about managing them.
Which Size for Which Project
| Project | Recommended cut | Adhesive approach | Sealing note |
|---|---|---|---|
| Tumbler, curved wall | Fine for the base, chunky or shaped as a top accent | Thin adhesive layer, sprinkle over it, tap off excess | Two or more clear coats so flake edges sit under the film |
| Resin coaster, flat | Fine to medium, mixed into the pour | Stir into resin before pouring, or sprinkle onto a partially cured layer | Use solvent-resistant color; clear top pour buries the texture |
| Nail art | Fine as the base, small shaped flakes as accents | Gel or dip base, place accents with a tool | Thick clear gel, then file the high spots flat before topcoat |
| Ornaments and decor | Medium to shaped | Brush adhesive and press flakes in place | Spray or brush sealant; avoid handling for 24 hours |
| Paper, cards, scrapbooking | Fine | Glue pen or double-sided sheet | A burnishing rub removes loose flakes without wetting paper |
| Decals and signage | Chunky or shaped, laid in a mask | Adhesive stencil, place flakes, then lift the mask | Clear laminate over the finished decal |
The pattern in that table is consistent: the more curved the surface and the larger the flake, the more sealing work you take on. Flat surfaces forgive a large flake; curved surfaces do not.
One boundary worth stating plainly. If a project involves skin, hair, or anything that will be worn against the body, buy cosmetic-grade material for that use rather than repurposing craft stock, and follow the label's own instructions. This guide covers surface and craft applications (tumblers, resin, ornaments, paper, nails as decorative finish), not cosmetic formulation.
The #1 Reason Chunky Glitter Falls Off
Chunky glitter rarely falls off because the adhesive was too weak. It falls off because the adhesive layer was too thin to reach the top of the flake.
A flake sits on a bed of adhesive and bonds across its bottom face. Everything above that bond line (the sides, the rim, the top edge) is exposed. When you drag a towel or a sleeve across the surface, the force lands on that exposed edge, and a flake is only as secure as its weakest contact point. Thick flakes magnify the problem because they stand taller, which gives every snag more leverage.
The fix is counterintuitive. You don't need a stronger glue. You need the adhesive to rise around the flake rather than sit beneath it, so the film locks the edges down. That's what the sealing step in a later section actually accomplishes.
Three mistakes cause most of the shedding people blame on adhesive choice:
- Spreading adhesive too thin to save material. A skim coat bonds the bottom face and nothing else. It dries fast, which feels efficient, and it leaves every edge standing free.
- Pressing flakes down hard. Pressing a dry flake into a wet layer pushes adhesive sideways and leaves it sitting on a ridge. Light pressure seats a flake; hard pressure displaces the glue around it.
- Working on a contaminated surface. Silicone residue, mold release, skin oils, and manufacturing films all sit between the adhesive and the substrate. Wiping with isopropyl alcohol and letting the surface dry takes a minute and prevents a failure that stays invisible until the first bump.
Why thickness beats strength. A flexible adhesive that moves with the surface holds better than a rigid one that cracks when the object flexes. If the cured film can bend with the flake instead of resisting it, mechanical force has to break the bond rather than peel it. That is why flexible clear coats outperform brittle glues on curved, handled objects.
How to Apply Chunky Glitter: Three Methods
There's no single correct technique. The right method follows from how much control you need over placement.
| Method | Best for | Control level | Main failure mode |
|---|---|---|---|
| Sprinkle over wet adhesive | Large areas, curved walls, tumblers, ornaments | Low; placement is random | Uneven density; bare patches where adhesive dried early |
| Place flake by flake | Shaped cuts, logos, borders, focal points | High; every flake is positioned | Slow; adhesive skins over before you finish |
| Mix into the medium | Resin pours, gel, clear topcoats | Medium; suspension, not placement | Flakes sink before the medium sets |
Method 1: Sprinkle Over Wet Adhesive
Coat the surface evenly with a thin adhesive layer, then pour or sprinkle glitter over it while the layer is still open. Let it sit for a minute, then tip the object and tap the back to release the excess. Work in sections on large objects so the adhesive does not skin over before you reach it.
The technique that decides the result is in the tap-off, not the sprinkle. You want the flakes that made contact to stay and everything loose to leave. Tap over a sheet of paper and pour the recovered flakes back into the jar. With chunky flakes, the recovered amount is significant enough to matter.
This method suits curved surfaces and large coverage areas, which is why it dominates tumbler work. For wall-thickness and durability questions specific to that project, see the tumbler application notes.
Method 2: Place Flake by Flake
Use tweezers, a wax pencil, or a damp tool tip to set each flake where you want it. Work from the center of the design outward. Shaped cuts (hearts, stars, butterflies, snowflakes) are made for this treatment, because their outline is the whole point and random sprinkling destroys it.
The constraint here is time. Most adhesives form a skin within minutes, so lay out the design first and place maybe a dozen flakes before re-wetting the area with a fresh dot of adhesive. Trying to cover a full ornament in one pass is how you end up with flakes sitting on dried adhesive that never bonds.
A shortcut that works for repetitive patterns: cut a stencil or use a vinyl mask to define the area, sprinkle the whole region, then lift the mask to reveal clean edges.
Method 3: Mix Into the Medium
For resin pours, nail gel, and clear topcoats, the flakes go into the liquid instead of onto a surface. Stir slowly, because fast stirring whips in air bubbles that stay visible in clear resin. Let the mixture sit for a few minutes so bubbles can rise before you pour.
Suspension is the challenge. Dense flakes sink toward the mold floor while the resin is still fluid, which is why glitter often ends up concentrated on the underside of a finished piece. Thicker resin, a partial pre-cure, or a two-layer pour all give the flakes less time to travel. Mixing into the medium is the right method when you want sparkle spread through the volume rather than sitting on top of it.
How to Seal It So It Stops Shedding
Sealing is the step that converts a decorative pile of flakes into a surface you can touch. Skip it, and the pile stays a pile. It also has the loudest bad advice on the internet attached to it.
Hairspray keeps circulating as a shedding fix because it appears to work for the first hour. It's a thin polymer film in an alcohol carrier, and it does hold flakes briefly. What it also does is stay slightly tacky, which attracts lint and dust, then soften again when the air gets humid.
The result is a surface that collects debris and darkens with handling. Hairspray is a display trick for a costume photographed once, not a finish for something you use.
Water-based craft sealers are a step up but still limited on handled objects: they sit on top of the flakes rather than locking the edges, and they can lift when the surface gets damp.
What actually stops shedding is a film thick enough to bury the exposed edges of the flakes. That means one of these, matched to the object:
| Sealant | Bonds to | Best for | Watch out for |
|---|---|---|---|
| Two-part epoxy resin | Rigid and semi-rigid surfaces | Tumblers, coasters, ornaments, decals | Work in thin layers; a heavy pour can float flakes and trap bubbles |
| Polyurethane or acrylic clear coat | Most craft surfaces, wood, metal | Objects that will be handled but not washed | Needs two or three coats; the first must be light |
| Gloss gel topcoat | Nail surfaces | Nail art and small accents | Requires building thickness; file high spots before the final coat |
| Spray sealant | Paper, décor, low-contact surfaces | Cards, scrapbooking, display pieces | Least mechanical protection; best for objects that stay still |
Two rules apply to every row.
The first coat goes on light. A heavy first pass can lift or dissolve the very flakes you are trying to lock down. Then build the film in layers, letting each one set.
Three thin coats bury flake edges. One thick coat runs and pools, yet still leaves rims exposed on the highest flakes.
A tape test tells you whether you're done before you ship or gift the object. Press a strip of clear tape firmly across a finished area, then pull it off at a moderate angle. If the tape comes away clean, the edges are locked.
If it brings flakes with it, add another thin coat and test again in a different spot. The check takes thirty seconds and catches the failure while you can still fix it.
For objects that are handled constantly, the same logic applies to the whole construction, not just the seal. Adhesive choice, surface prep, and topcoat belong to one system. The glitter shoe tutorial walks through that system on a high-flex, high-abrasion surface, which is the hardest case you will meet.
Solvent Resistance: Why Glitter Fades in Resin and Nail Polish
The same jar of glitter can hold its color in craft glue and lose it inside resin. The difference is chemistry, not quality.
Most decorative flake is built in layers: a plastic film base, a reflective metallic layer, a color layer, and in some products a protective top coating. That stack is stable against water, most craft adhesives, and normal handling. Strong solvents behave differently. Uncured epoxy hardener and nail products built on acetone or ethyl acetate can migrate into the color layer, and what you see afterward is a flake that has gone dull, patchy, or translucent.
Solvent-resistant products are made for exactly that environment. The coating over the color layer is formulated to resist those chemicals, which is why "solvent resistant" is the single filter that matters when you buy for resin or nail work, ahead of brand, cut, and price.
You can verify a batch yourself before committing to a project. Mix a small scoop into a clear sample of the medium you actually use, let it cure or dry fully, and check the color against an unmixed pinch of the same glitter.
If the color holds, the batch suits that medium. If it dulls or spreads, stop. The reaction isn't reversible, and it won't show up until the piece has cured.
Two related notes on the same chemistry. Solvent-resistant flake does not dissolve into the medium, so it also tends to show sharp flake edges rather than a soft blended haze; if you want a diffused look, that calls for fine cuts rather than a different coating. And flake that resists solvents still sinks in thin resin, because suspension is a density question rather than a coating one. The glitter for resin buying guide covers suspension and pour technique; the color question is what decides whether the project survives at all.
If resin or nail polish is on your project list, start from the solvent-resistant glitter range rather than from a color you like in a different line. Color is the easy thing to change later; a failed cast is not.
How Much Glitter Do You Need?
Weight is the wrong unit for planning a project. It's also the only unit most listings give you. Two 10 g bags in different cuts will cover very different amounts of surface, because flake count per gram drops sharply as size rises.
The reliable method is to measure once and scale up. Coat a small test area (a 2 in × 2 in square of the actual surface, with the actual adhesive) at the density you want in the finished piece. Weigh what it took, then multiply up to your real project area and add a waste margin for the flakes that bounce off, get tapped away, and land on the table. For a first project, that margin is worth setting generously rather than precisely.
Then match the result to the pack sizes you can buy. Suppliers ship a standard ladder, and choosing the wrong rung is where money gets wasted in both directions.
| Pack size | What it is for | Buy this when |
|---|---|---|
| 10 g / 0.35 oz | Sample and color check | Testing a colorway or a new technique |
| 20 g – 55 g | Small projects, single ornaments, nail work | Your measured need fits with margin to spare |
| 85 g – 140 g | Repeated projects, small batch production | You have already settled on the color and cut |
| 450 g / 1 lb | Regular production volume | Your test area math says you will use it within a season |
| 1000 g / 2.2 lb | High-volume or resale work | You know the exact product and will not switch |
Buying the smallest size first is not indecision; it is the cheapest step in the process. A sample bag answers the questions that matter before you commit storage space and budget to bulk: does the color match the photos, does it respond to your adhesive, does it survive your sealer? Standard cut and shaped-cut ranges both start at the sample tier, so there is no penalty for testing: browse the shaped chunky range to see what the shapes actually look like at each size, or start with a single colorway such as 6 mm round shaped holographic red to calibrate coverage per gram.
One more planning note. Adhesive and sealant quantities scale with surface area, not with glitter weight, and they are easy to underestimate on a first build. If your flake estimate says 40 g, budget enough medium to lay it twice, once to bond and once to seal.
Mistakes That Ruin the Finish
Most failed glitter projects trace back to a short list of avoidable errors. Here is the diagnostic table.
| What you see | What caused it | What to change |
|---|---|---|
| Flakes shed weeks later | Exposed edges; seal coat too thin or missing | Build two to three thin seal coats; tape-test before shipping |
| Bare patches in a sprinkled area | Adhesive skinned over before you reached that section | Work in smaller sections; keep the layer open or reapply |
| Clumps and stacked flakes | Adhesive applied too thick, or glitter poured too heavily | Thin even layer; pour, wait, then tap rather than press |
| Cloudy or milky finish | Excess adhesive pooling around flakes; trapped bubbles | Reduce adhesive volume; stir slowly and let bubbles rise |
| Color fades inside clear medium | Solvent attack on the color layer | Switch to solvent-resistant flake for resin and nail work |
| Edges lifting on a curved surface | Flake too large for the curvature | Move down a size, or bury the flake under more topcoat buildup |
| Surface stays tacky for days | Hairspray or a soft, non-curing sealer | Strip what you can, re-seal with a curing clear coat |
| Flakes come off in the wash | Water-based adhesive on a washable item | Reserve washable builds for resin or a wash-rated flexible adhesive |
The pattern behind most of these is worth naming. Glitter work fails at interfaces, not in the middle of a flake. Adhesive to substrate, flake to adhesive, sealant to flake.
Those are three interfaces, and each has its own preparation step. When something goes wrong, identify which interface broke before changing products, because swapping brands rarely fixes a preparation problem.
For color-specific considerations in mixed and dark palettes — where fading and contrast problems show up first — the black glitter buying guide covers how material choice shifts the visible result.
Frequently Asked Questions
Is chunky or fine glitter better for tumblers?
Neither is better — they do different jobs on the same cup. Fine glitter builds an even base layer with no gaps showing through. Chunky or shaped flakes go over it as accents, or sit in the lower section of the cup where the surface is flatter and light hits them directly. Most finished tumblers use both.
How do I stop chunky glitter from falling off?
Bury the flake edges under a curing clear coat. Apply two or three thin layers of epoxy, polyurethane, or gloss gel rather than one thick pass, and tape-test the result before you ship or gift it. A stronger adhesive alone will not fix shedding, because the failure happens at the exposed edge rather than at the bond.
Does hairspray really stop glitter from shedding?
It slows shedding for an hour or so and creates a worse problem afterward. Hairspray dries to a film that stays slightly tacky, so it collects lint and dust, and it softens again in humid air. It's a reasonable stopgap for a costume worn once and photographed, and the wrong finish for anything handled or washed.
Can I use chunky glitter in resin?
Yes, with two caveats. Use solvent-resistant flake, or the color can dull or bleed inside the cured piece. And expect suspension problems: large flakes sink faster than fine ones, so pour in layers, let the resin thicken, or pre-cure a base layer before adding flakes.
What is the difference between chunky glitter and shaped glitter?
Chunky describes size; shaped describes outline. Chunky flakes are hexagonal cuts in a large or mixed size range. Shaped flakes are die-cut into hearts, stars, butterflies, and similar outlines, and they are usually placed one at a time because random sprinkling destroys the shape that makes them worth buying.
How much glitter do I need for a project?
Measure it rather than estimate it. Coat a small test square with your actual adhesive at your target density, weigh what it took, multiply up to the full project area, and add a waste margin for flakes that bounce off. Then buy the smallest pack that covers the result — a 10 g sample is enough for the test itself.
What size glitter works best for nail art?
Fine cuts at 0.3 mm or smaller for the base, because they lay flat and build evenly under clear gel. Add small shaped or 1.5 mm flakes as accents when you want distinct sparkle. Anything larger than about 3 mm tends to sit above the surface and catch on clothing.
Can I mix fine and chunky glitter in the same project?
Yes, and mixing is often the strongest finish. The fine fraction fills the gaps between large flakes, so the surface reads as continuous sparkle instead of scattered points. Mix them dry before applying, or layer fine first and add chunky on top.
Conclusion
Chunky and fine glitter are two tools with different jobs, and the choice follows from the surface in front of you. Curved and handled objects reward small flakes and generous sealing. Flat, sealed, or embedded work can carry large flakes with much less effort. Buy by millimeter rather than by the word on the jar, and measure coverage instead of trusting the bag weight. Once the size is settled, bulk glitter for festival vendors covers MOQs, pricing tiers and supply planning.
The step that decides whether a project survives contact with real life is sealing, and it is the step most guides handle with a one-line tip. A curing clear coat, built in thin layers until it buries the flake edges, is what separates a display piece from something you can hand to a customer. Hairspray is not a shortcut to that result; it is a delay of the problem.
Here's the boundary worth stating, because it saves work: if every piece you make is flat, sealed behind glass, or embedded fully in resin, most of this guide doesn't apply to you. Shedding is a problem of edges that stay exposed on objects that get handled. Skip the sealing chapters for coasters and framed art, and spend that time on color matching instead.
For everyone else — tumblers, ornaments, nails, shoes, wearables — the sequence is fixed: prepare the surface, bond with an adhesive that reaches around the flake, then build a film that locks the edges. Get those three interfaces right and the size question becomes a design choice instead of a risk.
Reading Next
- Glitter for Resin Art: Bulk Buying Guide — solvent resistance, particle sizes, and how to buy resin-safe glitter in volume.
- White Glitter for Resin & Winter Crafts: 2026 Guide — material rules and techniques for snow globes, ornaments, and tumblers.
- How to Make Glitter Wine Glasses — a step-by-step build on glass, where adhesion and sealing behave differently.

Leave a comment
All comments are moderated before being published.
This site is protected by hCaptcha and the hCaptcha Privacy Policy and Terms of Service apply.