
Quick Answer
You can rhinestone a dress or shirt by choosing your stones (hot-fix or flat-back), selecting a method (heat transfer for sturdy fabrics or fabric glue for delicates), designing your layout with transfer tape, and applying each stone with steady precision. The full process takes 1 to 4 hours for most designs. Hot-fix rhinestones applied with a heat press last 30 to 50 gentle washes; glued stones last 15 to 25 washes with proper care.
How to Rhinestone a Dress or Shirt: Complete DIY Guide for Professional-Looking Results
The first time Maya Torres tried to rhinestone a jacket, she ended up with stones scattered across her kitchen floor, a burn mark on her ironing board, and a half-empty tube of glue stuck to the sleeve. "I thought it would take thirty minutes," she says. "It took three weekends and a lot of deep breathing."
Maya's story is not unusual. A rhinestone project looks straightforward on TikTok rhinestone tutorials, but the gap between a two-minute video and a real garment is filled with wrong heat settings, crooked rows, and stones that fall off after one wash. The good news is that every one of those problems has a fix — and most of them are easy to prevent once you know what to look for.
This guide walks through every decision you will face: which stones to buy, which method works for your fabric, how to lay out a design that stays straight, and exactly how to apply and care for each stone so your piece lasts through dozens of wears. Whether you are embellishing a prom dress, customizing a dance costume, or adding sparkle to a simple t-shirt, the steps are the same.
Why Most DIY Rhinestone Projects Fail (And How Yours Won't)
Almost every failed rhinestone project traces back to one of five root causes. None of them are expensive to fix, but skipping any one guarantees frustration.
Wrong stone type for the fabric. Hot-fix rhinestones require heat to bond. Silk, satin, and many synthetics cannot tolerate the temperature needed to melt the glue. Using hot-fix on a delicate blouse either fails to bond or damages the fabric. The fix is simple: match the stone type to the fabric's heat tolerance (see the compatibility table in the next section).
Skipping the pre-wash. New fabric comes from the factory with sizing, starches, and anti-static finishes that sit between the glue and the fibers. Washing removes that barrier. About 40 percent of adhesion failures in hot-fix projects trace back to unwashed fabric.
Guessing the layout. Placing stones freehand without any guide or transfer tape produces a wandering design. Even experienced crafters use guide lines. The difference between a professional result and a wonky one is almost always a strip of transfer tape used before the first stone touches the garment.
Inconsistent heat or pressure. A heat press delivers even, repeatable results. A household iron can work, but it introduces variables: the temperature drifts, the pressure varies with arm fatigue, and sliding the iron instead of pressing it shifts stones out of position.
Rushing the cure or cooling time. Glued stones need 24 to 48 hours to reach full bond strength. Hot-fix stones need the transfer to cool completely before peeling. Interrupting either process pulls stones loose before the bond sets.
Each of these pitfalls has a straightforward solution covered in the sections below. The pattern is consistent: prepare, measure, test, apply, wait. Skip none of those steps and you get a garment that sparkles for years.
What Kind of Rhinestone Should You Use?
Not all rhinestones work on clothing. The type of stone, its backing, and its size all affect how it looks, how well it bonds, and how much time the application takes.
Hot-Fix vs. Flat-Back vs. Pointed-Back
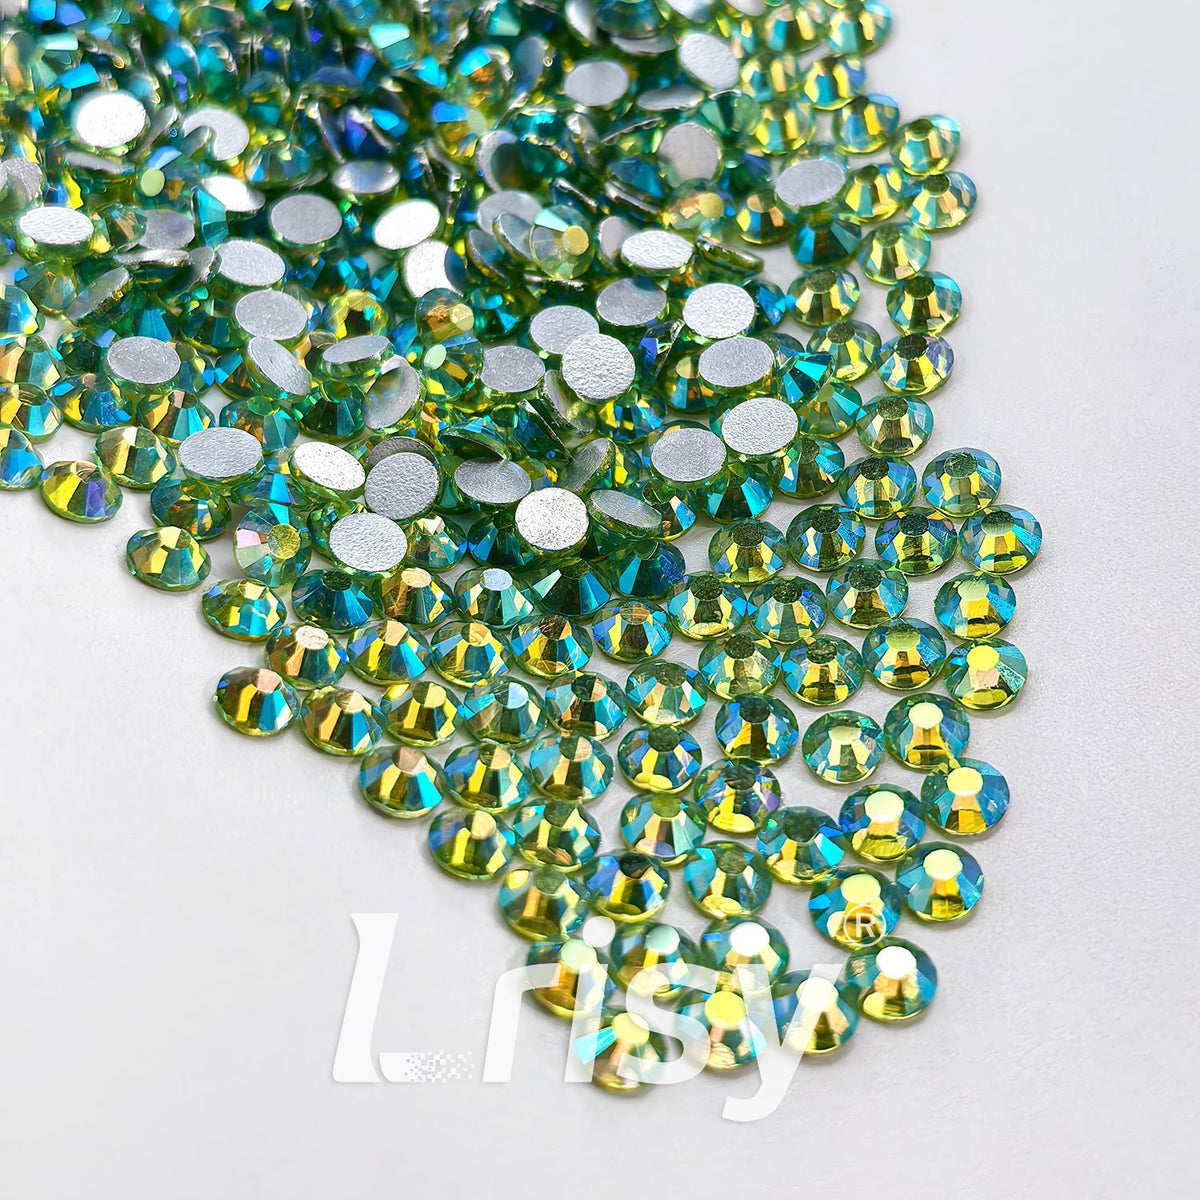
Hot-fix rhinestones have a pre-applied heat-activated glue layer on the flat back. When heated to 160 to 170 degrees Celsius (320 to 338 degrees Fahrenheit), the glue melts and bonds to the fabric. These are the standard choice for apparel because the glue layer is consistent and application is fast — a whole transfer sheet bonds in 12 to 15 seconds.
Flat-back (non-hot-fix) rhinestones have no glue. You apply craft glue to each stone individually. The advantage is control: you can place stones on fabrics that cannot take heat, and you can reposition them before the glue sets. The trade-off is speed — individual gluing takes 3 to 5 seconds per stone, and full curing takes 24 to 48 hours.
Pointed-back rhinestones (also called chatons or crystal rhinestones) have a pointed, faceted back and are designed for jewelry settings, not fabric. Avoid them for garments unless you mount them in a pre-made setting. The pointed shape does not sit flat on fabric, and they lack any glue backing.
| Stone Type | Best For | Application | Durability (Washes) | Cost per 100 |
|---|---|---|---|---|
| Hot-fix | Cotton, polyester, denim, blends, leather | Heat press or iron, 12-15 sec | 30-50 | $3-8 |
| Flat-back (non-hot-fix) | Silk, satin, lace, sheer synthetics, leather | Fabric glue, 24-48 hr cure | 15-25 | $2-5 |
| Pointed-back (chatons) | Jewelry settings, non-fabric surfaces | Prong or bezel setting only | N/A on fabric | $4-12 |
Rhinestone Size Guide
Rhinestones are measured in "ss" (stone size) units. The number refers to the diameter in 0.1 mm increments — a 16ss stone is approximately 4.0 mm, a 20ss is approximately 4.6 mm, and a 30ss is approximately 5.6 mm. The scale runs from 5ss (tiny, 1.5 mm) up to 50ss and beyond (large, 8.5 mm-plus). (For a historical overview of rhinestones and how they evolved from rock crystals to modern glass and crystal imitations, see the Wikipedia entry on rhinestones.)
| Size (ss) | Diameter (mm) | Good For | Stones per sq. inch (tight) |
|---|---|---|---|
| 12-16 | 3.0-4.0 | Detail work, letters, fine lines | 15-20 |
| 20-30 | 4.6-5.6 | Standard neckline, general designs | 8-12 |
| 30-40 | 5.6-6.4 | Bold statements, center rows | 5-8 |
| 40+ | 6.8+ | Accent centers, single-stone focal points | 2-4 |
Most beginner designs use 16ss or 20ss stones because they provide visible sparkle without overwhelming the fabric. Mix sizes within a single design to create visual depth — use 20ss for the main pattern and 30ss or 40ss as occasional accent stones. The Swarovski crystal library offers a useful reference for understanding how stone color, cut, and clarity affect light refraction on different fabric backgrounds. Shop pre-sorted hot-fix rhinestone packs by size at LRISY.

Fabric Compatibility: Which Materials Work With Each Method
Choosing the wrong application method for your fabric is the single most expensive mistake you can make. This table tells you at a glance which fabrics work with heat transfer, which work with glue, and which work with both.
| Fabric | Heat Transfer | Fabric Glue | Notes |
|---|---|---|---|
| Cotton (woven) | Excellent | Good | Pre-wash essential; heat is faster and more durable |
| Cotton jersey / t-shirt knit | Excellent | Good | Insert pressing board to prevent bleed-through |
| Polyester / performance wear | Excellent | Good | Test heat on a hidden seam first — some polyesters scorch at high temps |
| Denim / jeans | Excellent | Good | Heavy fabric holds heat well; use extra pressure |
| Cotton-poly blends | Excellent | Good | Most common shirt fabric; works well with both methods |
| Leather / faux leather | Good | Excellent | Use low heat and a Teflon sheet for leather; glue is safer |
| Silk / satin | Poor — heat damage risk | Excellent | Glue only; test glue transparency on a hidden area first |
| Lace / mesh / tulle | Poor — no flat surface | Good | Tiny glue dots; glue may show through open weaves |
| Very stretchy / thin jersey | Fair — needs stabilizer | Fair — stones restrict stretch | Use iron-on stabilizer behind the design area |
Heat Transfer vs. Fabric Glue: Which Method Belongs on Your Project?
The decision between heat and glue is not about which is "better." It is about which fits your fabric, your timeline, and your skill level. Both methods produce excellent results when matched to the right project.
Heat Transfer: The Speed Option
Why heat transfer works: The glue backing on hot-fix rhinestones is a thermoplastic adhesive. When heated to 160-170 degrees Celsius, it melts and flows into the fabric fibers. As it cools, it solidifies into a mechanical bond that is stronger than most fabric glues. The bond is not chemical — it is physical: the plasticized glue locks around individual threads. This is why pre-washing matters: sizing on new fabric coats those threads and prevents the adhesive from reaching the fiber surface.
Heat transfer is the right choice when you are working with cotton, polyester, denim, or any blend that tolerates 160 degrees Celsius. It is also the faster method by a wide margin. A full transfer sheet with 200 stones bonds in 12 to 15 seconds. The same number of stones glued individually would take 25 to 35 minutes of placement plus 24 to 48 hours of curing.
The downside is that a heat press costs money — entry-level models start around $80 to $150. A household iron can substitute but introduces more variables. The iron must remain perfectly still during the press, and maintaining consistent pressure over a large design is difficult by hand.
Fabric Glue: The Precision Option
Why fabric glue works: Glues like Gem-Tac and E6000 create a flexible rubberized bond after curing. The key property is flexibility — fabric moves and stretches, and a rigid adhesive would crack under that stress. Gem-Tac is a water-based polyurethane that stays slightly elastic even after full cure. E6000 is a solvent-based industrial adhesive that forms a stronger but less flexible bond. For garments that will bend, stretch, and twist during wear, an elastic glue bond outperforms a rigid one, which is why Gem-Tac is the more popular choice for clothing despite E6000's higher raw strength.
Fabric glue is the right choice when your fabric cannot tolerate high heat or when you are adding just a few accent stones to a finished garment. The glue method also allows repositioning — if you place a stone and it is slightly off, you can slide it into position within the first 30 to 60 seconds.
The trade-offs are time and durability. Glued stones need 24 to 48 hours of undisturbed curing. Even after curing, glued stones typically last 15 to 25 washes versus 30 to 50 for heat-applied stones.
Quick Comparison
| Factor | Heat Transfer | Fabric Glue |
|---|---|---|
| Best For | Cotton, polyester, denim, blends | Silk, satin, lace, delicate synthetics |
| Application Time | 12-15 seconds per transfer sheet | 3-5 seconds per stone + 24-48 hr cure |
| Durability | 30-50 washes with care | 15-25 washes with care |
| Repositionable? | No — permanent once pressed | Yes — within 30-60 seconds |
| Equipment Needed | Heat press or iron, parchment paper | Glue, toothpick or wax pencil, cardboard |
| Upfront Cost | $80-150 (heat press) or $20-40 (iron) | $10-20 (glue + tools) |
| Skill Level | Moderate — alignment and temperature control | Moderate — glue amount and patience required |
If you plan to make more than two or three rhinestone garments, invest in a basic heat press. The consistency, speed, and durability improvement pay for themselves within a handful of projects. Browse heat press and rhinestone application tools.
How to Design a Pattern That Looks Professional, Not Crafty
The most common beginner mistake is choosing a design that is too intricate for the chosen fabric and stone size. A pattern that looks crisp on paper often turns into a blurry, misaligned mess on fabric. The rule of thumb: simplify by one level from what you think you need.
Design Principles for Garment Rhinestones
Follow the garment's structure. Necklines, collars, plackets, cuffs, and pocket edges are natural lines that guide the eye. Placing rhinestones along these existing lines looks intentional. Placing them in the middle of a flat panel without any structural cue often looks arbitrary.
Use negative space. A solid block of rhinestones is heavy, expensive, and difficult to keep straight. Leaving gaps between clusters or using graduated density — more stones at the focal point, fewer as the design extends outward — creates visual rhythm and reduces the total number of stones by 30 to 50 percent.
Match stone size to design detail. Small stones (12ss to 16ss) reproduce fine details like letters and thin lines. Large stones (30ss and up) make bold statements but lack the resolution for intricate shapes. Never try to create a word with 30ss stones unless each letter is at least four inches tall.
Five Beginner-Friendly Pattern Ideas
- Neckline accent. A single row of 16ss or 20ss stones following the neckline curve. Start at the center front and work outward symmetrically. This is the lowest-risk design with the highest elegance payoff.
- Vertical back line. A single column of graduated stones from the nape of the neck to the mid-back. Use 20ss at the top, graduating to 30ss and 40ss toward the bottom. The vertical line elongates the torso.
- Cuff edge. A single row along the outer edge of each cuff. Subtle enough for semi-formal wear. Requires only 30 to 60 stones per cuff depending on sleeve width.
- Pocket outline. Trace a standard chest pocket or a decorative faux pocket. Works on denim jackets, button-down shirts, and hoodies. Use 20ss stones spaced evenly along the seam line.
- Scattered micro-clusters. Groups of three to five stones placed randomly within a defined area (shoulder, hip, collar point). Because alignment between groups does not matter, this pattern is the most forgiving for beginners.
Why Transfer Tape Is the $5 Tool That Saves Hours
Transfer tape (also called rhinestone picker tape or application tape) is a low-tack adhesive sheet that holds rhinestones in position while you arrange them and then transfers them as a group to the garment. It is the single cheapest tool that transforms a messy freehand job into a precise design.
Why transfer tape works: The tape's low-tack adhesive is strong enough to hold stones in place during positioning and transfer, but weak enough to release cleanly when peeled away. The transparency (or translucency) allows you to see through the tape and align your design against reference marks drawn on the garment. Without transfer tape, each stone is placed individually and any error in alignment compounds with every subsequent stone. With transfer tape, the entire design is assembled on a flat surface where you can see spacing clearly, then moved in one piece to the garment.
How to Use Transfer Tape
- Cut a piece of transfer tape slightly larger than your design area.
- Peel the backing and place the tape sticky-side up on your work surface.
- Position each rhinestone face-down on the tape according to your template or drawn pattern.
- Check alignment and spacing. Adjust any stones while they are still on the table — this is your last chance to fix positioning without prying stones off fabric.
- Carefully lift the tape with all stones attached and place it onto your garment. Press firmly so every stone contacts the fabric surface.
- Apply heat or glue according to your chosen method.
- Peel the transfer tape away slowly at a 180-degree angle. Pull straight back over itself rather than lifting upward.
Shop rhinestone transfer tape and application kits.
Heat Transfer Step by Step: From Pre-Wash to Final Press
This process works for any garment made of cotton, polyester, cotton-poly blend, denim, or heat-safe synthetic. Read the entire sequence before starting.
Step 1: Prepare your workspace. Clear a flat, heat-safe surface. Set your heat press to 160-170 degrees Celsius (320-338 degrees Fahrenheit). If using a household iron, set it to the cotton setting with no steam. Cover the pressing surface with a clean pillowcase or pressing sheet.
Step 2: Pre-wash and dry the garment. Wash the garment in cold water with mild detergent. Do not use fabric softener — it leaves a residue that blocks adhesive bonding. Dry on medium heat. Do not skip this step even if the garment is new.
Step 3: Insert a protective layer. Slide a Teflon sheet, parchment paper, or a piece of cardboard inside the garment between the front and back layers. This prevents the hot glue from bleeding through and bonding the garment shut. It also gives you a firm pressing surface.
Step 4: Preheat the fabric. Press the bare fabric for 5 seconds to remove moisture and wrinkles. This step is often skipped but significantly improves bond consistency — warm, dry fabric accepts the adhesive better than cool, slightly damp fabric.
Step 5: Position the design. Place your transfer tape with pre-arranged stones onto the garment. Press the tape down firmly so every stone contacts the fabric. If using individual stones without tape, place them on the fabric using a wax pick-up pencil or rhinestone picker.
Step 6: Apply heat. Press the heat press down over the transfer for 12 to 15 seconds with firm, even pressure. If using an iron, press straight down without sliding — sliding displaces stones. Apply the full weight of the iron plus some arm pressure.
Step 7: Cool completely. Let the area cool for 30 to 60 seconds. Do not rush this step. The adhesive needs to solidify before the tape is removed. Test the temperature with your hand — it should feel cool to the touch, not warm.
Step 8: Peel the transfer tape. Peel slowly at a 180-degree angle (pull the tape back over itself). If stones remain on the tape, replace the tape over the area and press again for 8 seconds.
Step 9: Press from the back (recommended). Turn the garment inside out and press the design area from the reverse side for 10 seconds. This melts the glue slightly deeper into the fabric weave and locks the stones more securely. This extra step can add 10 to 15 washes to the lifespan of the design.
Step 10: Let the garment rest. Lay the garment flat for 2 to 4 hours before wearing. This allows the adhesive to reach full bond strength. Wearing immediately is possible, but the bond will be stronger after the rest period.
Fabric Glue Step by Step: When Heat Is Not an Option
Use this method for silk, satin, lace, sheer synthetics, leather, or any garment with a "do not iron" label. The process is slower but more forgiving than heat transfer.
Step 1: Prepare the garment. Lay it flat on a covered surface. Insert cardboard or a cutting mat inside so glue does not soak through to the back layer.
Step 2: Mark your guide lines. Use chalk, a fabric pencil, or tailor's chalk to mark the key placement points. For text, draw horizontal guide lines that ensure letters stay on the same level. For symmetrical designs, mark the center line and work outward from both sides.
Step 3: Prepare your glue. Squeeze a pinhead-sized drop of Gem-Tac or E6000 onto a disposable surface. The Beacon Adhesives website publishes detailed cure time and washability comparisons for Gem-Tac. For E6000 safety guidelines, consult the Eclectic Products material safety data sheets. A dollop the size of a pea covers 10 to 15 stones. Dip the tip of a toothpick or bobby pin into the glue and transfer a tiny dot to the back of each rhinestone. Less is always better — glue that squeezes out around the edges catches dust, dulls the shine, and stains the fabric. The Craft Professional website offers additional tutorials on glue control and rhinestone placement techniques.
Step 4: Place each stone. Use a rhinestone picker or wax pencil to grip the stone and position it on the fabric. Press gently for 5 seconds. If the stone shifts, nudge it into place with the tip of the picker. Wipe away any glue squeeze-out immediately with a damp cotton swab. Once the glue starts to skin over (about 30 to 60 seconds), repositioning is no longer possible.
Step 5: Let the glue set. Leave the garment flat and undisturbed for 30 minutes. During this window the glue reaches a "set" state — the stones will not slide off, but the bond is not yet strong.
Step 6: Full cure. Leave the garment flat for 24 hours (48 hours for E6000). Do not wear, fold, or wash it during this period. The glue needs this time to reach its full bond strength. Rushing the cure is the number one cause of premature stone loss with glued rhinestones.
Step 7: Test before wearing. After 24 hours, gently tug one stone near the edge of the design. If it does not budge, the garment is ready. If it shifts, wait another 12 to 24 hours and test again.
How to Keep Rhinestones On Through 30+ Washes
Why rhinestones fall off in the wash: Washing machines subject rhinestones to three destructive forces: water (which weakens the adhesive-fabric interface over time), heat (which softens the glue and can re-melt hot-fix adhesive), and mechanical agitation (which pries at the stone edges). The combination of warm water, tumbling action, and the weight of waterlogged fabric creates shear forces that peel stones off gradually. Each wash cycle reduces the bond strength by a small fraction. The goal of proper care is to minimize all three forces simultaneously.
Washing. Turn the garment inside out so the stones are protected inside the fabric tube. Place it in a mesh laundry bag — this prevents stones from snagging on zippers or buttons from other garments. Wash on a gentle cycle with cold water. Use a mild detergent without bleach, enzymes, or fabric softener. For glued rhinestones, hand wash only — the machine's agitation is too aggressive for the glue bond.
Drying. Air dry only. Lay the garment flat on a drying rack or hang it. A machine dryer exposes the garment to heat that can re-melt hot-fix glue (weakening the bond) or soften fabric glue. If you absolutely must use a dryer, select the no-heat air fluff setting and keep the cycle under 15 minutes.
Ironing. Never iron directly over rhinestones. The heat re-melts the adhesive. Turn the garment inside out to iron, or steam the wrinkle-prone areas from a distance of 12 inches. If a stone area becomes wrinkled and steaming does not help, place a thick towel over the stones and iron the towel — the towel absorbs most of the heat while the pressure smooths the fabric.
Storage. Fold the garment with the rhinestone side facing inward so stones do not rub against other surfaces. Do not hang rhinestone-heavy garments on thin wire hangers — the weight of the stones can stretch the fabric over time. Use padded hangers or fold and store flat.
What to Do When Stones Fall Off
Stone loss is normal over the life of a rhinestone garment. Even professionally applied stones eventually work loose. The strategy is not to prevent every loss — that is impossible — but to make replacement quick and invisible.
Keep the original stone pack. Store a small bag of matching stones with the garment. Trying to color-match rhinestones months later is difficult because dye lots vary and lighting conditions change perceived color.
Replace fallen stones with fabric glue, not heat. If the garment already has hot-fix stones, resist the temptation to re-heat the area. The surrounding stones have already been through their optimal heat cycle, and applying heat again can damage them. Instead, apply a pinhead-sized drop of Gem-Tac to the back of the replacement stone, press it into the empty spot, and let it cure for 24 hours. The glue bond will hold as well as the original heat bond in the localized area.
Check after each wash. After washing, spread the garment flat and run your hand gently over the rhinestone area. Loose stones feel different — they tilt slightly when touched. Re-glue any loose stones immediately before they fall off and are lost.
Frequently Asked Questions
Can I rhinestone a dress without a heat press?
Yes. A household iron set to the cotton setting with no steam works well for small to medium designs. You need firm, even pressure and the ability to hold the iron still for 12 to 15 seconds without sliding. A heat press is better for large designs and production work, but it is not required for a single dress or shirt.
How many rhinestones do I need for a dress or shirt?
A standard adult t-shirt with a neckline design uses approximately 150 to 300 size 16ss stones. A full-coverage dress front can require 1,500 to 3,000 stones. As a rule of thumb, measure your design area in square inches and multiply by 10 to 15 stones per square inch for a tightly packed look, or 5 to 8 stones per square inch for a spaced design.
Do rhinestones survive washing?
Hot-fix rhinestones applied with a heat press survive 30 to 50 gentle wash cycles without falling off. Glued stones last 15 to 25 washes. The key factors are washing inside out, using cold water, and air drying. Machine drying cuts stone lifespan by at least half regardless of the application method.
What is the best glue for rhinestones on clothing?
Gem-Tac is the top choice for fabric rhinestones because it remains flexible after drying and withstands washing better than standard craft glue. E6000 is stronger but more toxic — use it only in a well-ventilated area and let it cure for a full 48 hours. Both are available at most craft stores and online.
Can I use Cricut rhinestone kits on a dress or shirt?
Yes. Cricut makes pre-designed rhinestone transfer sheets that work well for dresses and shirts. Apply them the same way as a standard design: position the transfer, press with heat, and peel. Cricut's system is convenient, but you are limited to the designs and stone sizes the company offers.
Will rhinestones damage my fabric?
Hot-fix rhinestones do not damage cotton, polyester, denim, or most blends when applied at the correct temperature. Fabric glue does not damage any material as long as you avoid saturating the fabric. Very sheer or loosely knit fabrics may show the glue or the stone's foil backing through the front of the garment. Test on a hidden area before working on the visible surface.
Can I put rhinestones on shoes or accessories?
Yes, but the application method differs. For shoes, handbags, and accessories, use E6000 glue and flat-back rhinestones. These surfaces experience more abrasion than clothing, so the stronger bond of E6000 is preferred. Rough the surface slightly with fine sandpaper before gluing for better adhesion on leather or synthetic materials.
What is the difference between SS and PP rhinestone sizes?
SS (stone size) and PP (pearl plate) are two different sizing systems. SS is the standard scale for crystal rhinestones and runs from 5ss (smallest) to 50ss and beyond. PP is used for pearl beads and some opaque stones. The two scales are not interchangeable. Always buy rhinestones using the SS scale for crystal stones. Confusing SS and PP sizes is a common ordering mistake.
One Crafter's Journey: From First Try to 24 Shirts
Sarah Chen, a high school teacher from Austin, Texas, wanted to rhinestone her school's spirit shirts for the annual pep rally. She had never used a heat press before. She chose a simple design: each shirt got a single star on the left chest and the student's initial on the back collar. Using 16ss hot-fix rhinestones and a household iron, she finished all 24 shirts over three weekends.
"The first shirt took two hours," Sarah says. "By the fifth one I could do a shirt in twenty-five minutes. The key was using transfer tape to pre-position the letters so each one came out identical. I ruined one shirt by accidentally sliding the iron and smearing a row of stones across the collar. After that I marked the iron position with painter's tape on the pressing surface so I knew exactly where to set it down."
Sarah's story illustrates the learning curve: the first project takes the longest, but each subsequent project is significantly faster because the setup and technique become muscle memory. The cost for her 24 shirts averaged $6.50 per shirt in rhinestones and supplies — far less than the $25 to $40 per shirt she was quoted by custom apparel shops.
Common Mistakes at a Glance
| Mistake | Why It Happens | How to Fix It |
|---|---|---|
| Wrong heat setting | Guessing instead of measuring temperature | Use a fabric thermometer or test on scrap first |
| Skipping pre-wash | Assuming new fabric is ready to use | Always wash and dry before starting |
| Using too much glue | Thinking more glue equals stronger bond | Pinhead-sized drop; press gently |
| Rushing the cure | Impatience to see the finished piece | Wait full 24-48 hours before wearing or washing |
| Design too small | Paper does not convey garment scale | Scale up 20-30% from your paper mockup |
| Sliding the iron | Habit from regular ironing | Press straight down; lift and move, do not slide |
Final Tips for Professional-Looking Results
Use a ruler or measuring tape to mark your starting line and check alignment after every three to four inches of stones. Taking thirty extra seconds to measure saves you from prying off an entire row that drifted off course.
Work in good lighting. Natural daylight near a window shows the true sparkle and makes gaps or uneven rows immediately obvious. Overhead room lights cast shadows that hide misalignments. A small desk lamp aimed at the work area from a 45-degree angle provides the best illumination.
Keep a small dish of water nearby when using a wax pick-up pencil. Dipping the tip keeps the wax tacky and the stones easier to grab. A dry wax pencil loses grip after a few dozen stones.
Practice on an old t-shirt before touching your final garment. Run a test strip of 20 to 30 stones to confirm your heat setting, your technique, and your chosen stone size looks right on the fabric. This test strip takes ten minutes and can save an entire garment.
Reading Next
- Beginner's Guide to Rhinestone Sizes and Shapes
- Hot-Fix vs. Non-Hot-Fix: Which Rhinestone Type Should You Choose?
- How to Clean and Store Rhinestone Clothing
- Best Glue for Rhinestones on Fabric: Complete Comparison
- Rhinestone Costume Design Ideas for Dance and Theater
Ready to buy wholesale rhinestones? LRISY offers factory-direct pricing on wholesale bulk rhinestones with fast international shipping. Browse our flat back, pointed back, hotfix, and colors AB collections for all your needs. Also explore rhinestone mixes and application tools.
Ready to bring your design to life? Browse the flat back rhinestones, hot fix stones, and colors AB collections to find the perfect stone for your shirt or dress — in the sizes, finishes, and wholesale packs your project needs.

Leave a comment
All comments are moderated before being published.
This site is protected by hCaptcha and the hCaptcha Privacy Policy and Terms of Service apply.